Global Service Exchange (GSX) is Apple’s single service, repair and order management tool for Apple partners to provide service business with Apple worldwide. GSX Web Services is a data exchange that enables partners to integrate their applications with GSX. OnSite helps you instantly access the GSX database for warranty and service parts lookups. You enter the serial number to look up and OnSite accesses the GSX database and returns the warranty status of the serial number and a list of parts that can be ordered for the equipment.
Lightspeed OnSite requires a GSX account to enable warranty and parts lookups. Apple recommends that you set up a new GSX account for doing OnSite GSX lookups. You must then request that the Can Access Web Services privilege is added to this GSX account by Apple.
Setting up GSX with OnSite
1. To request a GSX account
-
Create a unique AppleID to be used when accessing GSX. You can use an existing Apple ID.
-
Apply for GSX access to your SoldTo account in GSX.
-
Verify that the Apple ID has access to GSX under your SoldTo.
-
Submit the request form to have API access enabled by selecting the Production environment. Make sure that the User ID entered is the same user ID created in the previous steps. Enter the GSX account info and specify the following in these fields:
-
Environment: GSX Production. Do not select GSXUT, which is the default option.
-
APIs Required: PartsLookup, WarrantyStatus.
-
In the Notes field include the words Lightspeed OnSite GSX Setup to ensure correct setup of your GSX account.
-
This GSX account is shared by all users who do Warranty Lookups, so you can choose to create a specific account for this purpose. The account must have the Can Access Web Services privilege enabled by Apple Service Provider Support in order for OnSite to authenticate securely to the GSX server.
2. To set up costs for service parts
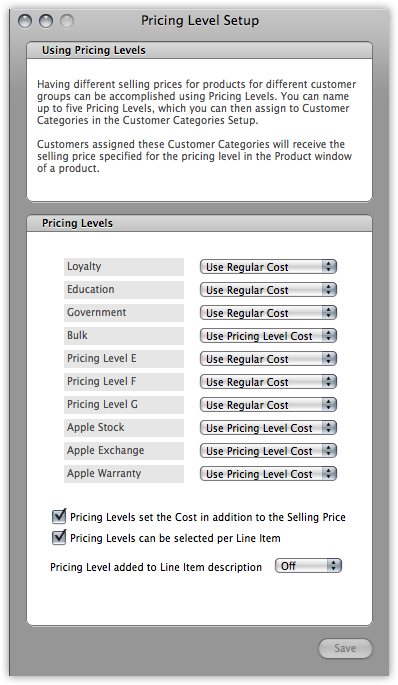
You can configure OnSite to handle alternate costs for Apple service parts, especially for stock or exchange repairs. To do this, create Pricing Levels named Apple Stock, Apple Exchange, and Apple Warranty in the Pricing Level setup panel, and select their checkboxes to enable an alternative cost for that level. For each of these levels, select the Use Pricing Level Cost option from each pop-up menu, and make sure you select both checkboxes at the bottom of the Pricing Level Setup window.
3. To choose your GSX settings
- In OnSite StoreMaster add Apple Service as a supplier.
- In OnSite StoreMaster on the Tools menu click Setup > Apple Reseller > GSX.
-
From the Apple Services Supplier menu select Apple Service.
- From the Stock Pricing Level menu select the Apple stock price level you set in Pricing Levels.
- From the Exchange Pricing Level menu, choose the Apple exchange price level you set in the Pricing Levels. This populates the alternate price and alternate cost you have set up for the Apple Exchange and Stock Pricing Levels when you create a new product from Apple’s parts list.
- When you requested your GSX account with Apple, you received a certificate that you import here. In the Certificate are click Import and navigate to the certificate. You must also generate a private key, and there will be instructions from Apple. In the Private Key are click Import and navigate to the key.
- To test your connection, click Test Connection.
Using GSX
To set automated pricing
You can mark up the selling prices for stock pricing and Apple Exchange levels.
- In OnSite StoreMaster on the Tools menu click Set Selling Prices.
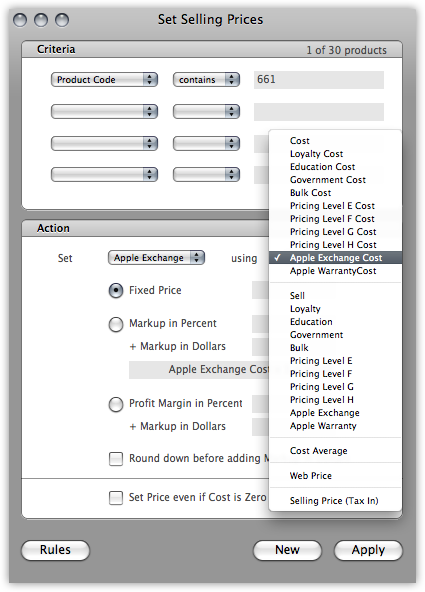
- From Criteria choose Product Code to select which products are affected.
- In the Action area choose the actions for the pricing level you want to set.
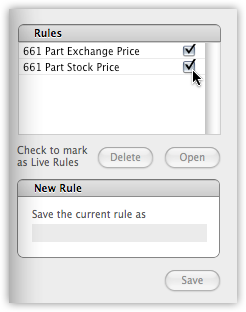
- Either click Apply to apply the pricing change to the products in the database, or Rules to create a rule to use later. You can click the checkbox for the rule to make it live so that it's applied as new products are created.
To handle costs for Apple service parts
Store the costs associated with Apple service parts as a pricing level cost. Because the same Apple part can be associated with several costs such as warranty, exchange, and stock, we advise you to not enter a cost for the part in the supplier costs grid, and instead enter the cost manually on the purchase order, depending on the kind of repair it is. This gives you a level of control that helps prevent parts from being mistakenly entered into your inventory with the wrong cost.
To handle GSX carry-in repairs
In addition to performing a parts lookup, you can use OnSite to send parts orders to Apple's GSX database from a GSX purchase order. After the parts order has been submitted, any tracking must be done directly in Apple's GSX system until the part arrives and is received on the purchase order. You return Apple parts, whether through warranty or exchange, through GSX and not OnSite.
To create a GSX purchase order
- Create an SRO and do a parts lookup for the Apple serial number.
- Add the parts to the SRO:
- Search for the part directly via Part Description or Code.
- Alternately, search for the product the part is for, then select the desired part from that product's drop-down menu. For example, if you're looking for a battery for an iPad Mini 3, search for the iPad Mini 3. From the drop-down menu, select Battery Only Price.
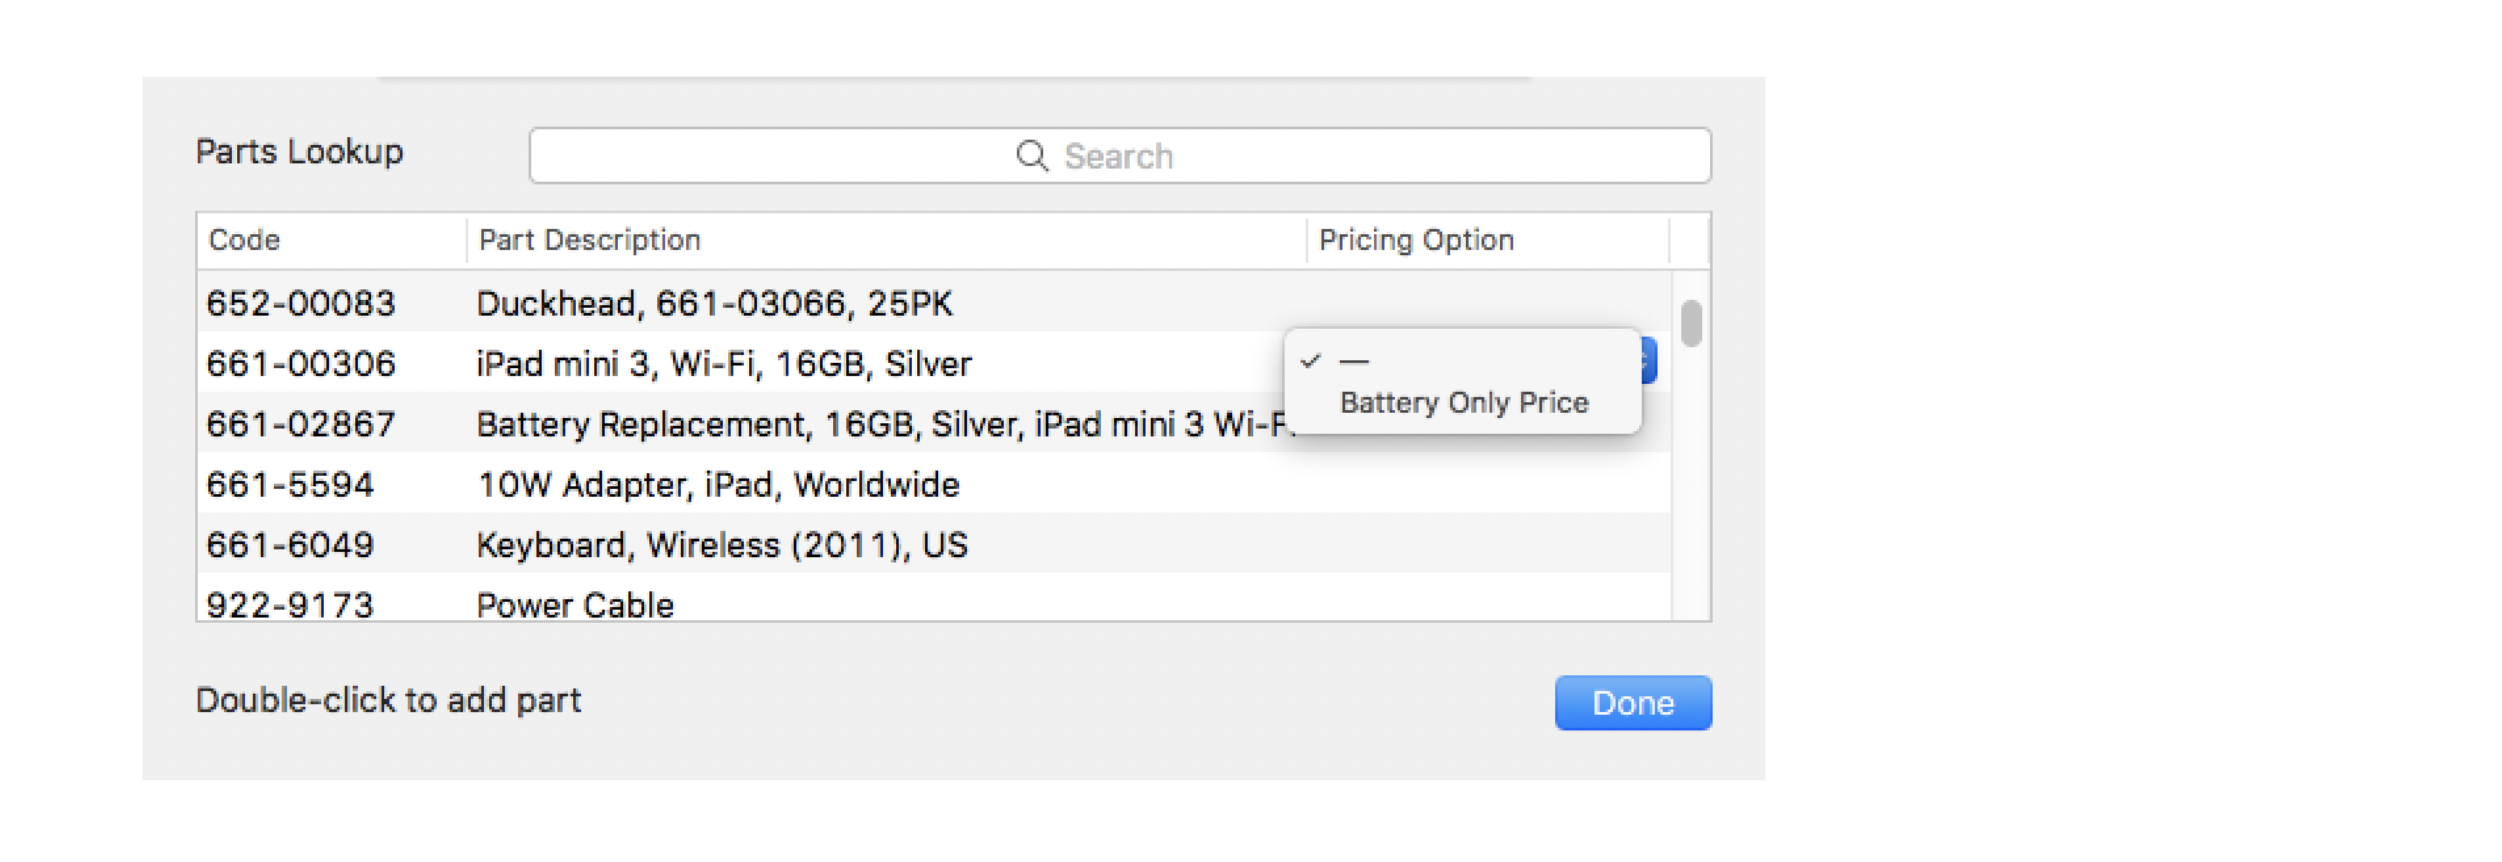
- Click the Order button at the bottom of the SRO and save it.
- Click the PO button at the bottom of the order to create a purchase order for the parts and save the PO.
To create a GSX carry-in repair request from a purchase order
-
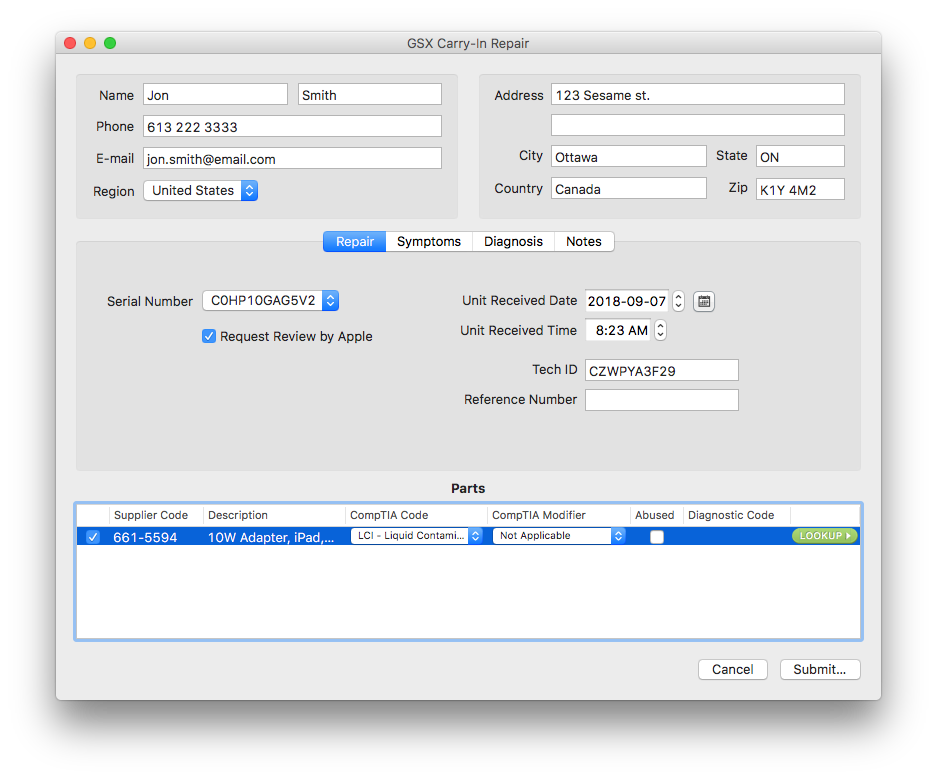
At the bottom of the PO click the Action gear and select Submit GSX Carry-In Repair.
-
In the GSX Carry-In Repair window confirm the tech ID for the technician associated with the repair.
-
Enter the time and date when you received the Apple unit for repair.
-
Enter any relevant information in the Symptoms and Diagnosis tabs.
-
Click Lookup beside the part you are ordering to populate the CompTIA Code choices for that item.
-
From the value list, choose your code.
-
Select the reason for the repair, then select a CompTIA Modifier to add details about the problem. Repeat steps 6 and 7 for each part you are ordering.
-
If the part has been physically damaged, select the Abused checkbox.
-
After you select a CompTIA Code and Modifier for each part, click Submit. Within seconds you receive a diagnostic code for each part and a reference number you can use to track the case in GSX.
-
When the part arrives receive it on the appropriate purchase order and then either reserve it to the order to have it displayed as unavailable, or incorporate it into your repair and it will be removed from stock when you convert the SRO to an invoice.