You and your staff are going to use these three area of the OnSite interface, depending on your role and the tasks you need to do.
|
StoreMaster Used by managers and administrators |
|
|
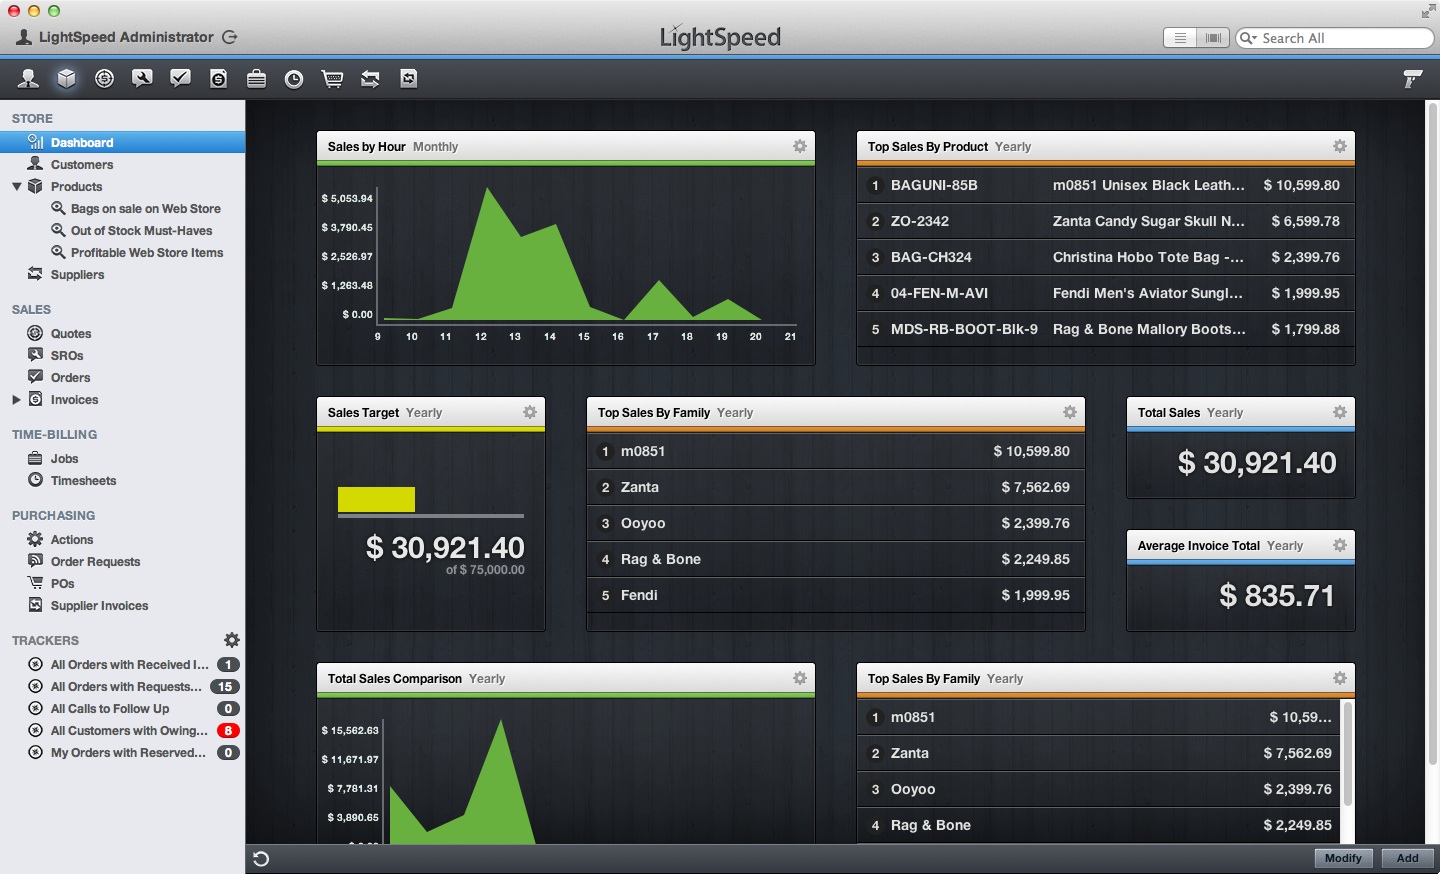
Dashboard Used by managers and administrators |
|
|
OnSite POS Used primarily by sales associates |
|
About StoreMaster
StoreMaster has these main areas:
- Source List is located along the left side and provides access to all your documents and data.
- Main List displays search results and listings.
- Notifications displays system and user notifications.
- Parked Items displays any items you have parked for quick access.
Source List
Almost all your business data in Lightspeed OnSite can be found by choosing one of the sources listed in the left column of StoreMaster. Click a link for more information about each item.
- Store, including Dashboard, Customers, Products, and Suppliers.
- Sales, including Quotes, Invoices, Orders, and SROs.
- Time-Billing, including Jobs and Timesheets.
- Purchasing, where you can access Order Requests, Actions, POs, and Supplier Invoices.
- Trackers, displaying any installed trackers.
- Transfers, where you can manage Multi-Store transfers if you have Multi-Stores.
Main List
Select a source, such as products, to display a list of all the products in the Main List. When you select a source, the filter menus appear at the top near the search field. Enter terms in the search field and select choices in the filter menus to quickly find the relevant documents you need. A filter menu contains searchable data fields found in that source.
When you search for a product, the menu enables you to search based on fields like class or description. In some cases, only one filter menu is available. However, sales documents can also be filtered based on when they were created or modified, within a pre-defined time period, or over the date range you specify.
Use these filters to quickly sort through your entire data set and find the documents or profiles you’re searching. Double-click any result in the Main List section to open it.
You can create new sales documents by dragging one or more products to the Source List and dropping them on a source. For example:
- Hold Command (⌘) and click to select two products.
- Drag and drop those over the word quote in the Source List to open a new, unsaved quote for these items. You can do drag-and-drop for orders, invoices, purchase orders, supplier invoices, and transfers.
Smart Finds enable you to configure an advanced search for products, customers, or documents that meet the criteria you define. You can perform a one-time Smart Find, or you can save it to have access to it any time you want.
Gallery is a graphical layout that lets you browse through products, customers, and suppliers using the images in their profiles. You can double-click an image to open the profile. If you don't want to use the gallery you can disable it in Tools > Setup > Company > Searching.
Notifications
Notifications for key user and system events are available in Lightspeed OnSite 3.8+. There are currently three notifications:
- Finished reports
- Downloaded Web Orders
- Messages related to your Lightspeed OnSite license
Parked Items
The Parked Items area is like a clipboard for OnSite documents, with drag-and-drop for profiles or documents you need to reference frequently. To park a document, drag it from the Main List to an available space. Click a parked item to preview it. Double click a parked item to open it.
To edit sales documents in Parked Items, drag a customer or product from the Main List and drop it over the document. A message appears asking if you want to edit the document.
About Dashboard
Dashboard is OnSite's analytics tool. Access Dashboard from the Store section of the Source List. The Dashboard has useful widgets that you can add, modify, or customize to your liking. To get a high-level view of how your store's performance, add one of the widgets such as Sales by Hour or Total Products Sold. To drive your store's performance, you can add the Sales Target widget.

To add a widget
- In StoreMaster go to the Dashboard.
- Click Add and scroll up or down in the list to see the list of widgets.
- Drag the widgets you want to use onto the Dashboard.
To configure a widget
- Click the gear icon in a widget's top right corner.
- Change the widget settings.
- Click the checkmark.
To move, resize, and remove widgets
- Click the Modify button at the bottom of StoreMaster.
- To remove a widget, click the remove button in its top left corner.
- To resize a widget, drag its bottom right corner.
- To move a widget, click its header and drag it into position.
About OnSite POS
OnSite has an intuitive Point of Sale (POS) interface that streamlines front counter retail checkout.
What makes OnSite POS different
- first POS that uses the power of Mac OS X and showcases its advanced graphics capabilities.
- first POS on OS X with a full multi-user sales workflow, powered by a high-performance SQL database
- only POS software to integrate Cover Flow technology, so that you can browse customers and products by their images.
There are 2 modes in the POS screen for finding and invoicing Products: Scan Mode and Button Mode. Each mode maximizes the POS for different retail environments, whether you have a high volume with a limited number of popular products, or carry a much larger set of items. After you create an Invoice using either mode, you enter the Payments screen to apply payment methods to the balance owing.
To use OnSite POS go to Configuring OnSite POS.