1. Add a customer to the sale
To add a walk in
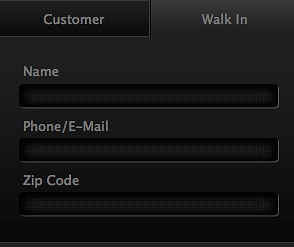
If you don’t want to track the customer’s history, choose Walk In in the left area of the POS screen. A walk in does not have a customer ID and you can't add this invoice to a customer’s history. Enter as much or as little information about the customer as you like. This information is searchable to help you find the invoice in the future. Important: You cannot track a customer’s purchase history or their outstanding balances or credits if they are a walk in.
To add a new customer
To add a new customer to the database click New in the customer area.
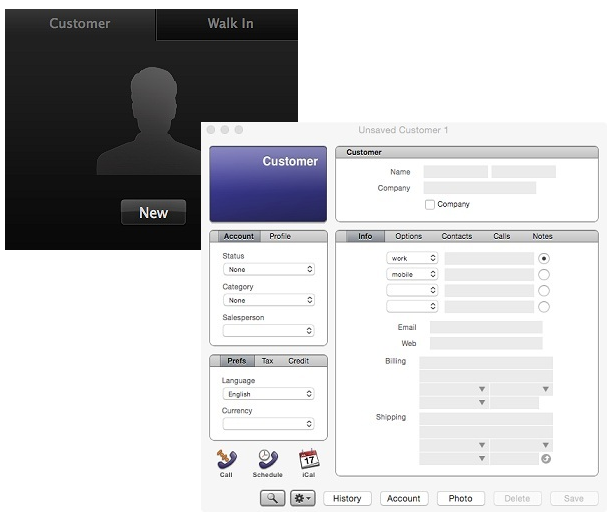
Add information for the new customer and after you click Save you return to the adjusted invoice.
To add a new customer’s photo to their profile, click the Image button in the customer card. Click the photo area in the Customer Detail area of the POS screen and it automatically takes their photo with your iSight camera. You can also drag an image to this area to store a photo. Click Save and the customer info including their image appears on the invoice.
To find a customer
If a customer is already in your customer database, at the top of the OnSite POS, click the customer icon.
In the Search field type a few letters of their name or a few numbers from their telephone number or address and choose it from the list of possible choices that appear by clicking the name once, or clicking their image from the Coverflow layout. To view all of the customers in your database clear any information in the Search field and click the All icon (circle with three lines). If you want to edit a customer's information, click the expansion indicator to display the contact info, click Edit, make your changes and click Save to return to the POS screen. The modified information appears on the invoice.
To add a salesperson to the sale
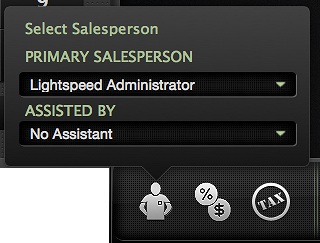
At the bottom of the invoice, click the Salesperson icon.
If a customer is a walk in, or a customer with no salesperson assigned in their customer card, the salesperson attached to the sale is the one who is processing the Invoice. If the customer has a profile with another salesperson assigned, the salesperson processing the sale can split the invoice into primary and assisting users. This combination is split in commission reports as its own salesperson to simplify split-sale commissions.
2. Add products
If you're in scan mode
To add a product to a sale, do one of these:
- Click the Products icon, and scan its barcode.
- At the top of the OnSite POS click the Product icon.

Enter a product code or description of a product, including partial strings. As you type, the list of results is refined with matching results. If you don't want to display partial matches click the down arrow beside the results to Use Exact Match for Product ID. To see a list of all the products in your database click the All icon (circle with three lines.) When you find the product you want, click it once to preview its availability or twice to add it to the invoice.
If the product you choose has a serial number you must add the number before clicking Check Out. You can scan the serial number from the product, or enter it manually.
Because the availability displayed in OnSite should reflect what is in stock, it is unlikely that you will try to invoice a product that isn’t displayed as available. Any products that are not available appear with a red warning triangle on the invoice, and before you check out you are asked to confirm that you wish to continue.
If you're in button mode
In Button mode, you add Products by clicking their image after drilling down through the POS Categories you have created and assigned to your Products. If an image has a black drawer covering it, it is a Category that contains either more Categories, or Products. Clicking a Product adds it to your Invoice. In Button mode, Invoice items are displayed to the right side of the screen, rather than the middle.
To change the tax code
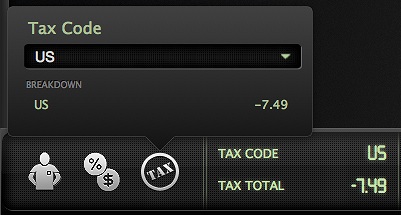
At the bottom of the invoice click the Tax Code icon.
If you have multiple Tax Codes that can be applied depending on the Customer, you can choose which Tax Code to apply by clicking the pull-down menu. Not making a selection results in the default Tax Code being applied to the document.
Adding a serialized product
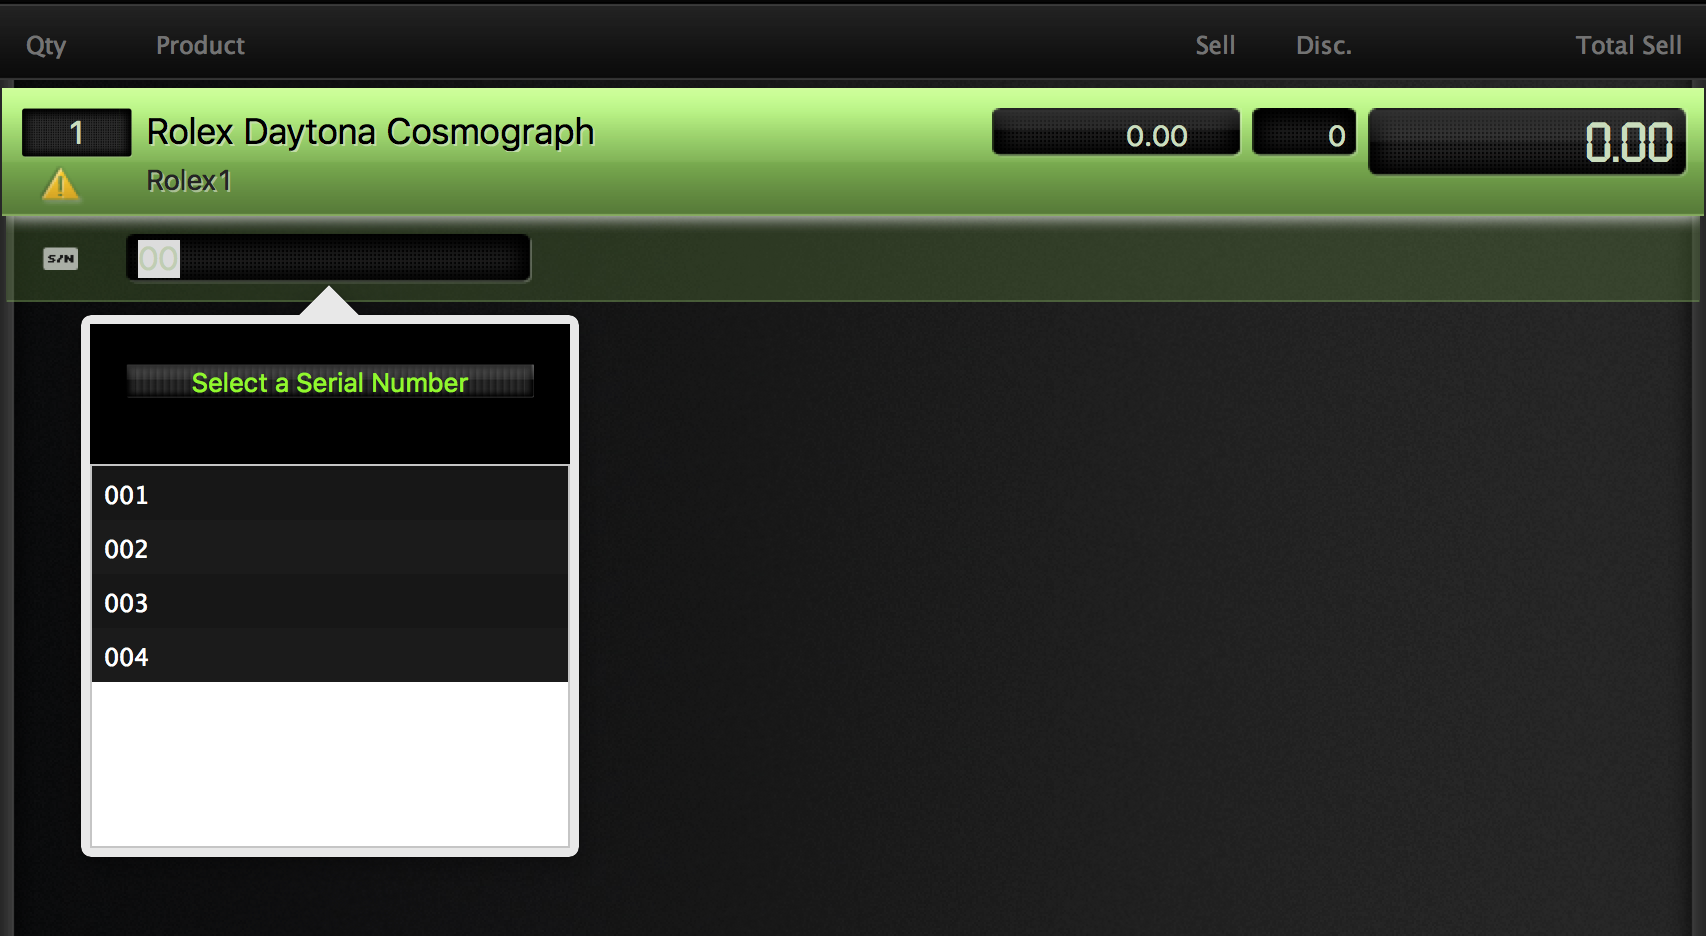
If you add a serialized product to an invoice, you'll need to specify a serial number for that product. Once the product is added, a text field will appear directly below it in which you can enter the serial number. You can search for an existing serial number by entering a partial number in that field. You can then select your choice from the list of results.
3. Optionally add discounts
There are several ways to apply discounts. If you have customer categories set up customers can automatically get discounts. You can also give discounts for individual items or the entire sale.
To set up customer categories
With customer categories you can create discounts that will be automatically applied to products' selling prices for certain types of customers. When you assign a customer to a category, each time the customer is attached to a sales document you're asked if you want to use the discounts associated with this category.
To apply discounts per item
To apply discounts on a line-item basis by clicking the Disc. box of a line-item you want to discount. Enter a number to discount the item by dollars or a percentage sign to apply a percent discount.

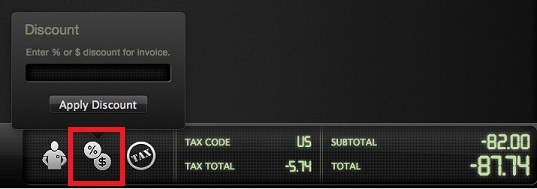
To apply a discount to an entire sale
At the bottom of the POS screen click the %$ icon.
- To apply a dollar discount, enter a value and click Return.
- To enter a percentage discount, enter a number and the % sign.
4. Take payment
When you have finished adding product information to a sale click Check Out to go to the Payments screen. After you press the Process button for a payment it is saved it to the invoice and it is irreversible except by an administrator.
To take payment for a sale
The Payments screen has buttons for each payment method set up in Tools > Setup > Payment Methods. Clicking a button displays the details for a payment. The amount tendered automatically shows the balance owing on the invoice, and you can edit this for partial payments.
OnSite integrates with several payment gateways for fast, simple, accurate online processing of credit card transactions. At the time of purchase, you can enter the customer’s credit card information, and click Process to send the encrypted information over the internet. If the transaction fails, you are notified immediately. For successful payments, a confirmation number is logged on the invoice. OnSite automatically accesses your credit card processor for any method of payment specified as Credit Card in Tools > Setup > Basics > Payment Methods. If you do not process credit cards within OnSite, you can use an external terminal and manually enter credit and debit card payments in OnSite.
To automatically send a payment to Genius Terminal (for Cayan users)
If you have selected Automatically Send for the Terminal setting in the Station Setup, the full payment for the transaction is automatically be sent to your Cayan Genius terminal when you click Check Out. Your customer can then pay with their card and finish the sale.
To automatically detect card swipes
To have OnSite automatically detect the card type for swiped card payments using a USB-connected card swipe at any point in the payment screen, map your credit cards.
- In Tools > Setup > Basics > Credit Card Mapping map the cards you accept.
- In Tools > Setup > Point of Sale > Point of Sale select Accept Credit Card Swipes at Any Time.
Then anytime you are in the payment screen a card swipe immediately enters the full payment amount and you can click Process to complete the transaction.
To use several payment methods
If a customer wants to use more than one payment method, modify the amount tendered to reflect the division of payment. Save the payment and click the button for the next payment method. A customer can use the same method of payment, but from a different source, such as a different credit card, for example, even though they are both Visas. The different payment methods are displayed separately on the printed invoice and saved as separate payments.
To process cash payments
During cash payments two fields are displayed: Amount Tendered, and Payment Amount. Amount Tendered is how much cash the customer gives you before you return their change. Payment Amount is how much of that cash the customer wants to apply to the invoice. If the amount they want to apply is different than what appears, click this field to change the amount being applied.
Press the cash denomination buttons that correspond to the amount of money the customer gives you. You can press any button more than once to add that quantity again. You can also press the MAX button if the amount tendered equals the payment amount. If the customer wants cash back, you can press MAX and then the denominations buttons for the amount of cash that the customer wants back. You can’t subtract amounts. You have to manually clear and start again.
To apply credits
If a customer has a credit from a previous invoice and has a customer profile, you can use their credit as a method of payment. Click the Store Credit button to display a list of the customer’s available credits. Choose one and specify how much of it to apply. If a customer has more than one credit you need to apply, you must choose each one separately and save it as its own method of payment. Click OK to return to the Payments screen.
To put a sale on hold
If you started a sale and added products or a customer but have not yet gone to the payment screen, you can put the sale on hold and return to it later. The data (customer and products) is maintained even if you process other sales transactions in the meantime.
Note: You can't put a sale on hold after you click the Check Out button and enter the Payment screen. From the Payment screen, you can click either Go Back, which results in an owing invoice if the sale is not processed or voided immediately, or Void to delete the sale completely without resulting in an owing invoice.
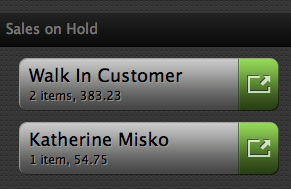
To put a transaction on hold, click the Hold button in either Scan or Button Mode. The product and customer information on the invoice is saved and accessible in the future identified by an icon that appears in the Sales on Hold section of the POS. Click the icon to re-activate the transaction and complete the sale.
If you are in the middle of a transaction when a held sale is re-activated, you have the option to discard the current invoice or to hold it. If you leave the POS screen, the held sale is discarded and must be re-entered.
To take a payment from OnSite for Mobile
If an invoice has been created on OnSite for Mobile, it can be paid by processing a credit card immediately from the handheld device, as long as OnSite is configured to process credit card payments with a payment gateway. If a customer is paying by an alternative payment method that requires access to the cash drawer, such as cash or cheque, or if the you use an external transaction terminal, OnSite for Mobile can relay or dispatch the invoice to all of the OnSite sales stations logged into the POS screen.
After the OnSite for Mobile user chooses Use Other Payment Method, they are given an invoice ID that appears in the Hold section of the POS screen with an orange Mobile icon. To access the invoice, click the icon and process the payment on the payment screen like any other POS invoice. After the invoice is activated from one station's POS screen, it is not displayed in any others.
5. Print or email the receipt
When you are ready to print, select which types of receipts to print, including a gift receipt that lists all products but does not show the prices.
Invoices contain:
- invoice number and barcode
- invoice date
- dates of any modifications
- product
- payment method
- printed notes
- terms and conditions
To email a receipt
To email a customer their receipt from the POS, select Email Receipt, and enter the customer's email address if it is not auto-populated from their customer card. An HTML-formatted copy of their receipt is immediately sent to the customer.
To set up your mail server go to Tools > Setup > Advanced > Mail Server. For information about what data to enter in each field, access the account information of your email server. For example, in OS X Mail, go to Preferences > Accounts. Select the account to integrate with OnSite, and gather this info:
- Username - User Name (if applicable)
- Password - Account Password (if applicable)
- Host - Outgoing Mail SMTP Server
- Port - Default Port
- Use SSL - Enable/Disable SSL Encryption
- Use Transport Layer Security - Enable/Disable TLS
- Use Authentication - Enabled if you use a Username/Password
To configure the Mail Server
- Record the Outgoing SMTP Mail Server (Host) name.
- Click the pop-up menu and select Edit Server List.
- Record your user name and password, if they are entered.
- Note whether your SSL is enabled.
- Record the first default port listed.
- Enter this information in the Mail Server Setup panel.
- If you are unsure about whether you should enable your transport layer security, or if you have any questions about any other settings, contact your mail server administrator.