The migration process starts after your products are migrated into your Retail account. Follow the steps below to configure your new eCom Store.
Contact Lightspeed Support for assistance.
Migration steps
- Receive an email from support
- Migrate your data
- Test your checkout process
- Complete all open orders
- Migrate your domain
- Communicate to your customers
1. Receive an email from Support
Support will begin the process by sending you an email with the subject:
eCom - Getting onboard with Lightspeed - From Onsite to Retail
You need to discuss the migration process and answer:
- Questions you may have regarding the migration process.
- What unique identifier will be used to migrate your products.
- Whether you plan on designing a new eCom store or want to migrate your previous design.
- Do you plan on using Lightspeed Payments for your new eCom store?
2. Migrate your data
Employ the following strategy to migrate your data:
- Have both your Retail and OnSite connected eCom stores open in separate tabs or windows on your computer.
- Migrate by copying settings from your OnSite connected eCom store to your new one.
- Skip any setting that was not configured in your OnSite connected eCom store, or any that will be configured differently in your new eCom store.
Migration responsibilities
| Data | Migrated by Lightspeed Support team | Your responsibility to migrate |
| Orders |
Not migrated by Support |
Transactions from OnSite and Orders from eCom cannot be migrated. Create a report for OnSite or an export for eCom these to keep as a record. |
| Products |
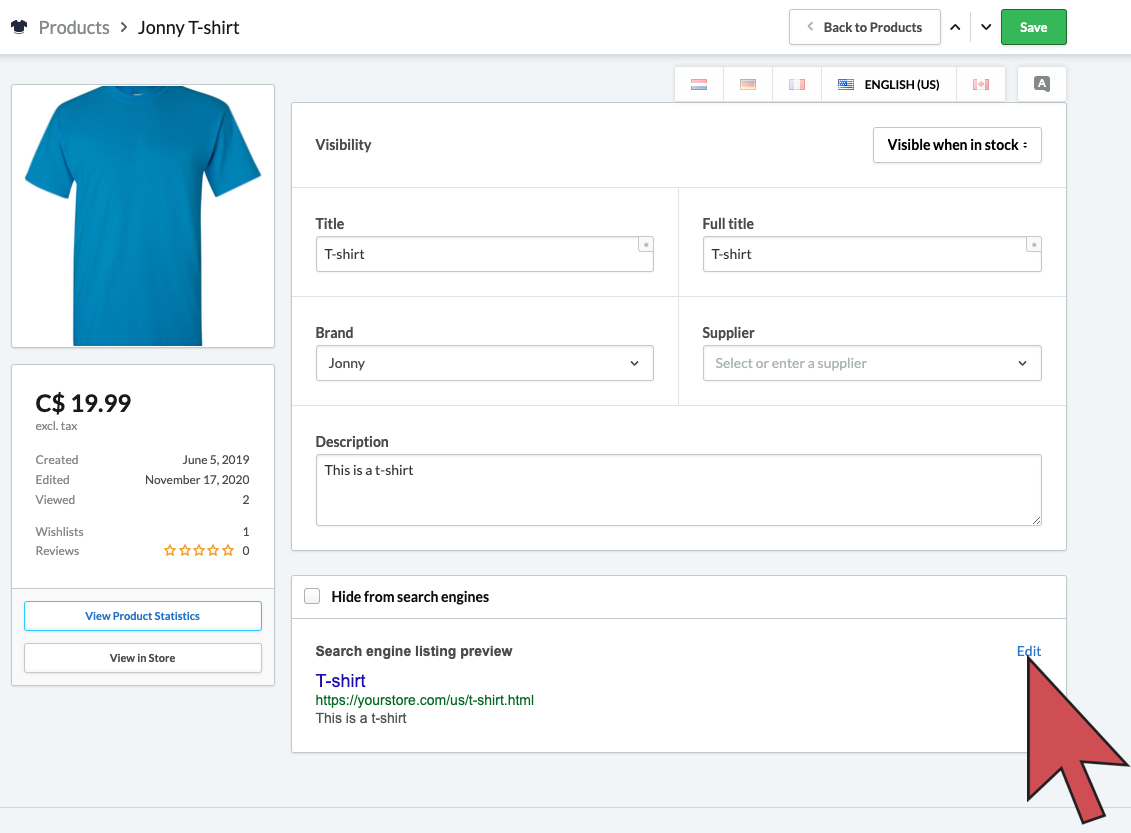
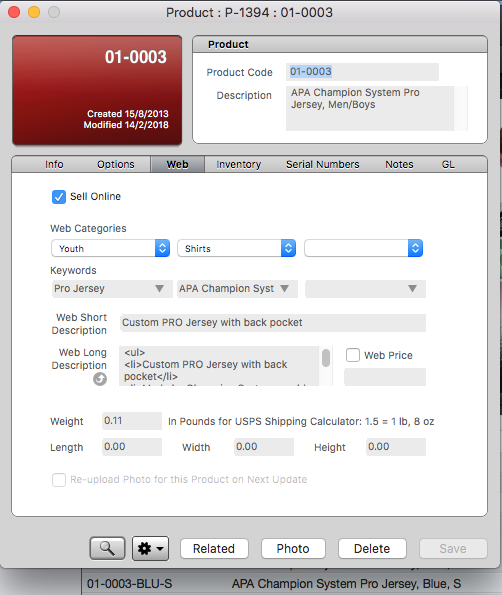
The web fields from the product card. The SEO data of a product in eCom |
|
|
Categories |
The three-tier web categories from product card. |
|
| Customers |
Customer details |
Customer groups |
| Design |
Theme Editor |
You have the option to create a new design yourself, instead of Support migrating the design of your OnSite connected eCom store. |
| Content | Not migrated by Support | |
| Marketing | Upselling | |
| Blogs | Not migrated by Support | Blogs Blog posts |
| Apps | Not migrated by Support | Purchased Apps |
| Settings | All settings except domain |
Domain |
Products > Variant images
Your images are already migrated by eCom Support. You can assign images to variants so that when a customer selects the variant, the image changes to match.
- In your Retail connected eCom back office, click Products > Inventory.
- Scroll through the list and verify that the images match the variant.
- When a variant image does not match, click the product title.
- Scroll to the INVENTORY & VARIANTS section. For each variant, click on the image icon and select the correct variant image > Save.
Read Adding variant images for more information.
Products > Custom fields
- In your OnSite connected eCom store, click Products > Custom fields.
- Create the same custom field sets in your new eCom store.
- In your OnSite connected eCom store, identify the products that were configured with custom fields:
- Use the titles of the custom fields as clues.
- Speak to the person who manages your products, they may remember which products had custom fields.
- Inspect the CUSTOM FIELDS section of each product in your OnSite connected eCom back office.
- Assign the custom fields to the products in your new eCom store.
For more information, read:
Products > Filters
- In your OnSite connected eCom back office, click Products > Filters.
- Open your new eCom store and recreate the filters in the matching fields.
- Identify the products that were configured with filters, export your product filter values in your OnSite connected eCom back office > Tools > Exports > Add Export > Filters > Export.
- Assign the filters to the products in the new eCom store.
- You can do this per product in Products > Product name > scroll to the FILTERS section.
- You can import the filters to many products.
For more information, read:
Products > Reviews
- In your OnSite connected eCom back office, click Products > Reviews.
- Open your new eCom store and recreate the reviews in the matching fields.
Read how to create a review for more information.
Products > Specifications
- In your OnSite connected eCom back office, click Products > Specifications.
- Open your new Retail connected eCom store and recreate the specifications in the matching fields.
- Identify the products with specifications by filtering your products in your OnSite connected back office:
- Click Products.
- Filter the results on the page by clicking Filter in the search bar.
- Click Specifications.
- Select the name of a specification and click Apply filter.
- Open your new eCom store and assign the specifications to the products.
Read Creating Specifications for more information.
Products > Related products
- In your OnSite connected eCom store, identify the products that were configured with related products:
- Speak to the person who manages your products, they may remember which products have related products.
- Inspect the RELATED PRODUCTS section of each product in your OnSite connected eCom back office.
- Open your new Retail connected eCom store and recreate the related products in the matching fields.
Read Adding related products for more information.
Manually created categories in eCom
Any categories and content that you manually created in your OnSite connected eCom store must be migrated.
- In the first tab, open your OnSite connected eCom store. Navigate to Products > Categories.
- Open a product by selecting its title.
- In a second tab, navigate to Products > Categories in your new eCom store.
- Create categories to match the same ones in your OnSite connected eCom store.
- Select Rearrange Categories to order the categories into the same pattern.
- Open the first category in your OnSite connected eCom store. Do the same in your new eCom store.
- Copy the description, content, images, search engine SEO, products and visibility settings. Select Save.
- Repeat steps 6-7 for the rest of your categories.
Customer groups
- In the first tab, open your OnSite connected eCom store. Navigate to Customers > Customer Groups.
- Open a customer group by selecting its title.
- In a second tab, navigate to Customers > Customer Groups in your new eCom store.
- Select Add Customer Group and enter the same title as your OnSite connected eCom store.
- Open the newly created group and add the same customers from your former OnSite connected eCom store to the new eCom store.
- Repeat these steps for all customer groups.
Design
If you choose to redesign your new eCom store, read Introduction to designing your eCom store.
Content
Migrate all information you find under:
- Content > Pages - Create any new text pages as required. Make sure to add translations of the content by clicking the country flag in the top, right-hand side of the screen. These appear if you have additional languages have been enabled.
- Content > FAQ - Click Add FAQ subject and recreate subjects in your new eCom store. Then, click Add question to copy any question and responses from your OnSite connected eCom store.
- Content > Translations - You can create both custom translations and translation overrides. Create a custom translation for any translations labeled with a custom translation tag.
For more information, read:
Blog
- In your OnSite connected eCom back office, click Blogs.
- Recreate every blog and blog post in your new eCom store. Make sure your blog posts are live.
- Recreate comments by adding them manually on your website. The publishing date will be the present day, the date of migration.
For more information, read:
Marketing
- Migrate all information you find in your OnSite connected back office under:
- Marketing > Discount codes
- Marketing > Discount rules
- Then click Newsletter > Export Subscribers. Use this mailing list for sending newsletters while your subscribers grow in the new eCom store.
For more information, read:
- Discounting products
- Creating discount codes
- Creating discount rules
- Creating newsletter mailing lists
Apps
- In your OnSite connected eCom back office, click Apps > Purchased apps > Installed.
- Reinstall the same apps in your new eCom store, ignoring any apps labeled as Theme. Apps labeled as Theme are only there to inform you of the currently installed theme. These are modified when installing a new theme.
Read Lightspeed eCom App Store for more information.
3. Test your checkout
These steps are important to ensure your customers do not have difficulty purchasing on your new eCom store. This article explains how to test your checkout.
4. Complete all open orders
Before you switch your domain and completely migrate to your new eCom store, make sure to fulfill all remaining eCom orders.
5. Migrate your domain
Follow the below instructions when you're prepared to launch your new eCom store.
Domain connection prerequisites
- Complete these steps during a period of time your OnSite connected eCom store has low traffic. These steps may prevent customer access to your eCom store.
- Be the owner of a domain. For instructions on buying a domain, click here.
- Login to your domain provider and locate the DNS of your domain provider. Your domain provider is the company from which you purchased your domain. Contact your domain provider if you have difficulty.
Instructions
- In the back office of your OnSite connected eCom store, click Settings > Domains.
- Note the custom domain exactly as written.
- Click Set as default beside the .shoplightspeed or .webshopapp domain.
- Click the red trash can to delete the domain.
- Login to the back office of your new eCom store and click Settings > Domains.
- Click Add new domain and add the domain exactly as written in your OnSite connected eCom store.
- Click Save. The screen titled CONNECT YOUR DOMAIN will display. Note the URL displayed under record. This will be used later in your domain provider's instructions.
- Open your domain provider's account and access the DNS settings.
- Edit the CNAME record with the shoplightspeed or webshopapp domain. Replace the URL with the new URL you noted from record on screen titled CONNECT YOUR DOMAIN. Save the record.
- Access your domain in a private browsing window to test it. Repeat this until accessing your domain displays your new eCom store's home page.
- Login to the back office of your new eCom store and click Settings > Domains. Click Set default beside your custom domain.
6. Communicate to customers
Now that you've finished migrating your eCom store, you should notify your customers that they should update their password. This is a great opportunity to advertise your new eCom store.
Changes that will affect your customer:
- Their password will no longer function on your eCom store because these cannot be migrated.
- Since orders cannot be migrated, they will not have their order history.
- Wishlists cannot be migrated. Your customers will need to recreate their wishlists.
For help on how to notify your customers, read Communicating to customers they need to reset their password.
Reference
The product card
SEO data of a product in eCom

