With Sale Events you can plan sales in advance and automatically begin and end them based on date and time. You can create as many Sale Events as you like, and each event can contain multiple sale offers with discounts, products, and customer associations. For example, you can create a Sale Event called Holiday Sale with these sale offers:
- Winter coats: $50 discount on selected coats for all customers
- Accessories-General: 10% discount on selected accessories for all customers
- Accessories-Education: 20% discount on selected accessories for customers in the Education customer category only.
Sale Events activate and deactivate automatically based on the specified date and time. When a Sale Event is in effect (activated), the discount is automatically applied to a sale event product when it is added to an invoice. This ensures that the correct discount is always applied.
Tip: To avoid discount modifications on invoices, make sure that your sales associates have the Discount on Invoices user privilege set to not allowed.
You can also print product labels for sales to display the discounted price, and use Report Master to track the performance of previous Sale Events.
How discounts work with Sale Event products
The Sale Event discount is automatically applied to a product when it’s added to an invoice. However, OnSite always applies the greatest discount for each product on an invoice. For example, if a Sale Event product has a 30% discount, and you associate the invoice to a customer that has a 50% discount as part of their customer category, if you choose to apply the customer discount when adding the customer, the product will be reduced by 50% and not 30%. If you choose not to apply the customer discount, the product will be reduced by 30% and not 50%. If a product is included in more than one active Sale Event, the best price throughout all sales is automatically applied.
Creating a Sale Event
Note: A user must have the Configure Sale Events user privilege set to Allowed to create and manage Sale Events.
- In OnSite StoreMaster, right-click Events > New.
- Enter a descriptive name for the Sale Event.
- Specify the start and end dates and times for when the Sale Event will activate and deactivate.
- Click Create.
- Click Events to display the Events window, and double-click the event you created.
- In the event window, enter a description for the event, such as Month Sale.
- In the Sale Offers section, click +.
- Enter a descriptive name for the sale offer, such as Winter Coats.
- Enter the discount amount and set the discount as a percentage or dollar amount.
- Specify which customers will receive the discount by selecting a customer category, or set the offer to All Customers.
Note: A customer must be added to an invoice if they're part of the selected customer category for the discount to take effect. - Click Create.
- In the Sale Offers section select the sale offer you just created. The sale offer’s settings appear.
- Under Products, click +.
- Filter the product list if required, select the products you want to include in the sale offer, and click Add Selected or Add All to add all products that are currently displayed.
- With the products added to the sale offer, you can either create another sale offer or click Save to exit the event window.
Printing sale event product labels
Make sure that your customers know when a product is on sale by printing labels for your sale event products. The product label will display the discounted price along with the Sale Event name.

To print labels for your sale event products, make sure that the Print Sale Labels option is enabled in the Print Product Labels dialog. For how to print labels go to Printing labels.
Note: The Sale Event must be activated for the discounted price to appear on the label.

Reporting on Sale Events
How successful was a previous Sale Event? Should a previous sale be repeated or modified? With ReportMaster, you can plan future sales by tracking the performance and effectiveness of your sales events.
- In OnSite StoreMaster on the Tools menu click ReportMaster.
- Select a category from the list on the left, and then a report from the list on the right. For example, Sales > Sales by Product.
- Select a From and To date range.
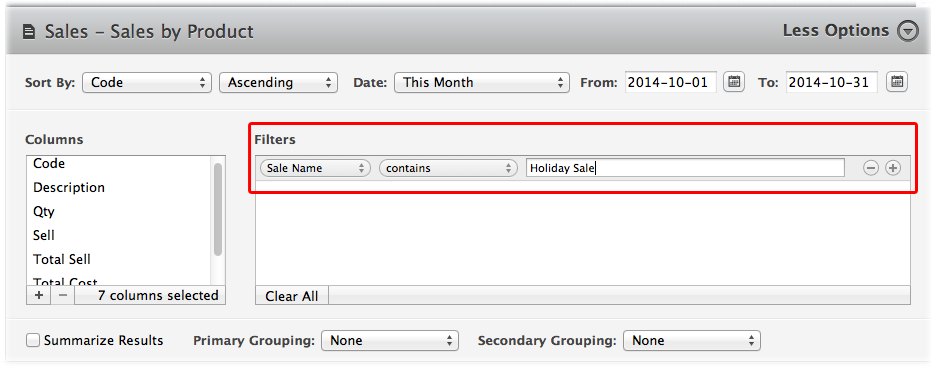
- In the Columns section click + and select Sale Name.

- If you want to report on a specific sale, select Sale Name from the first Filter list, a matching criterion in the second list, enter the search term and click Run.
