If you want to make your products browsable by category on OnSite iPad POS, create POS categories. These categories may already be defined if you use the POS in button mode.f
OnSite supports three levels of categories:
| Primary |
Primary category is the most general classification of your products, such as Housewares or Clothing. Each primary category can have multiple secondary categories: |
| Secondary |
If “Housewares” is a primary category, a secondary category might be “Dishes.” If “Clothing” is a primary category, a secondary category might be “Women’s Clothing.” Each secondary category can have multiple tertiary categories: |
| Tertiary |
If “Dishes” is a secondary category, a tertiary category might be “Ceramic Dishes.” If “Women’s Clothing” is a secondary category, a tertiary category might be “Dresses.” |
Secondary and tertiary POS categories are optional. After considering how you want your products to be organized on OnSite iPad POS, create your POS categories.
To create primary categories
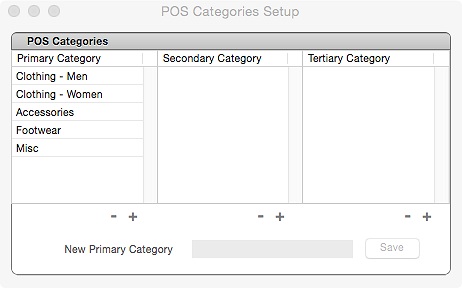
- In OnSite StoreMaster on the Tools menu click Setup > Point of Sale > POS Categories.

- In the New Primary Category field, enter the name of a primary category and click Save.
To create secondary categories
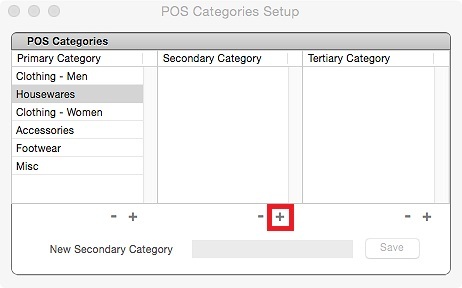
- Select a primary category from the list and click + under the secondary category column.

- In the New Secondary Category field, enter the name of a secondary category and click Save.
Continue adding secondary categories that belong to this primary category by entering the name and clicking Save.
To create tertiary categories
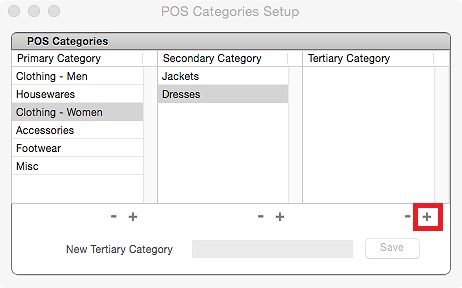
- Select a secondary category from the list and click + under the tertiary category column.

- In the text input field, enter the name of a tertiary category and click Save.
Continue adding tertiary categories that belong to this secondary category by entering the name and clicking Save.