Managing your stock in multiple stores is simple with multi-store transfers. They enable you to quickly transfer stock, streamlining the movement of inventory from one store to another. Transfers are recorded in the inventory tab of Product cards.
To run Transfers In and Transfers Out reports go to Tools > ReportMaster and filter on transfer. These reports update you of the status of incoming, outgoing, and in transit transfers.
The process for transferring stock is:
- Create a Transfer Out in the store of origin.
- Enter quantities in the Sending tab to remove stock from the store's inventory. The status is In Transit.
- Receive the Transfer In at the receiving store.
- Enter the quantities you’re receiving to bring the stock into the store’s inventory. The Transfer Out in the originating store's inventory now has a Sent status.
To create a Transfer Out
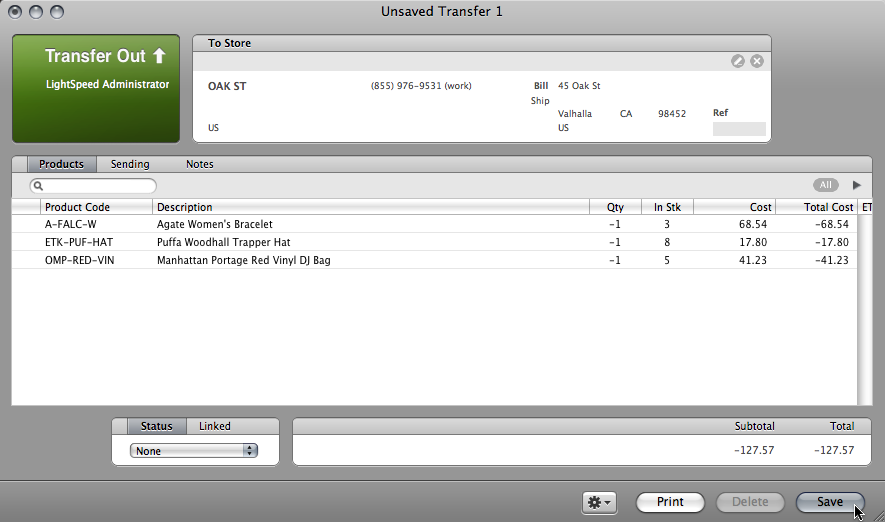
- To create a Transfer Out, under Transfers right-click Transfers Out and click New.
- Add the store to transfer to.
- Add products to the transfer as you would add products to a purchase order. The default quantity is negative 1. If you modify the quantity, you must use negative values to remove the product from your inventory.
- Click Save.
- Click the Sending tab and confirm the quantities. Enter the appropriate quantities in the Qty Sent column. If you are sending a serialized product, click the product line and add the serial numbers.
Note: You must transfer out all quantities on the transfer. You cannot process a partial Transfer Out. - After you enter the Qty Sent values for the products, click Send. The product quantities are removed from your stock levels, and the transfer is In Transit until the receiving location receives the Transfer In at their location, at which point the status of the Transfer Out is automatically changed to Sent.
You can view all of your Transfers Out in the Browser by clicking Transfers Out.

To create a Transfer In
- To update the list of your pending incoming transfers, in the Source list click Transfers In, and then click Create Transfer In at the bottom of the browser. Receiving the Transfer In brings the stock into your inventory.
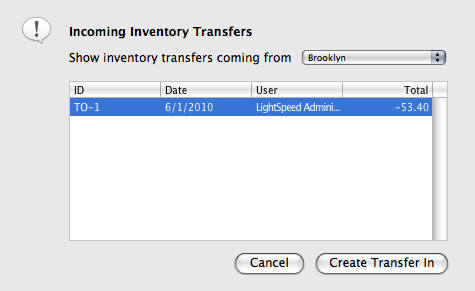
- Go to File > Receive Transfer In, or click Receive Transfer In at the bottom of the browser. Choose the location you are expecting a Transfer In from.
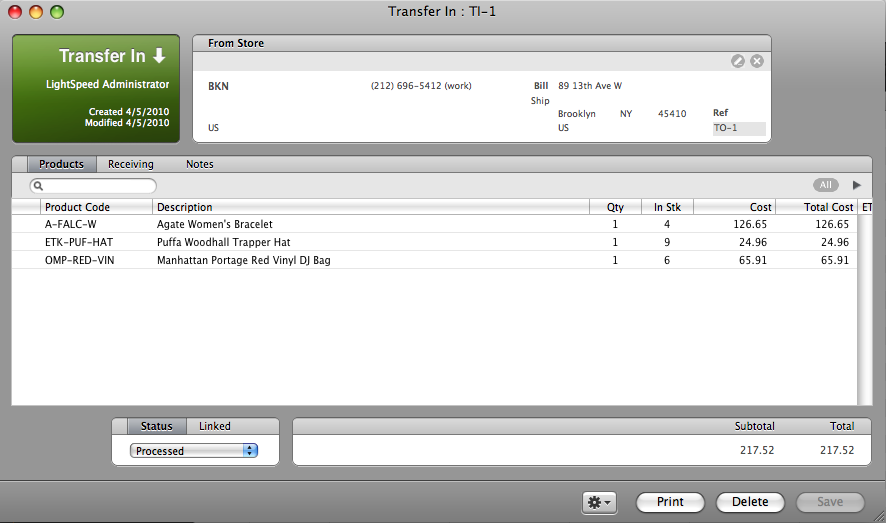
- Select the transfer you want to receive and click Create Transfer In. OnSite creates a new Transfer In that you can bring into your inventory.
- Click the Receiving tab. Enter the quantities of stock that you are receiving. If you are receiving a serialized product, enter the serial numbers. Click Save. The quantities are added to your inventory and taken out of the inventory of the sending store. When a transfer is received, its status automatically reflects the change, as well as the status of the Transfer Out from the sending store.
You can view all of your Transfers In in StoreMaster by clicking Transfers In under Transfers.

To cancel a transfer
You can cancel transfers that are in the In Transit status by changing the status to Cancelled. This brings the products back into your inventory.
